# RGB Lighting
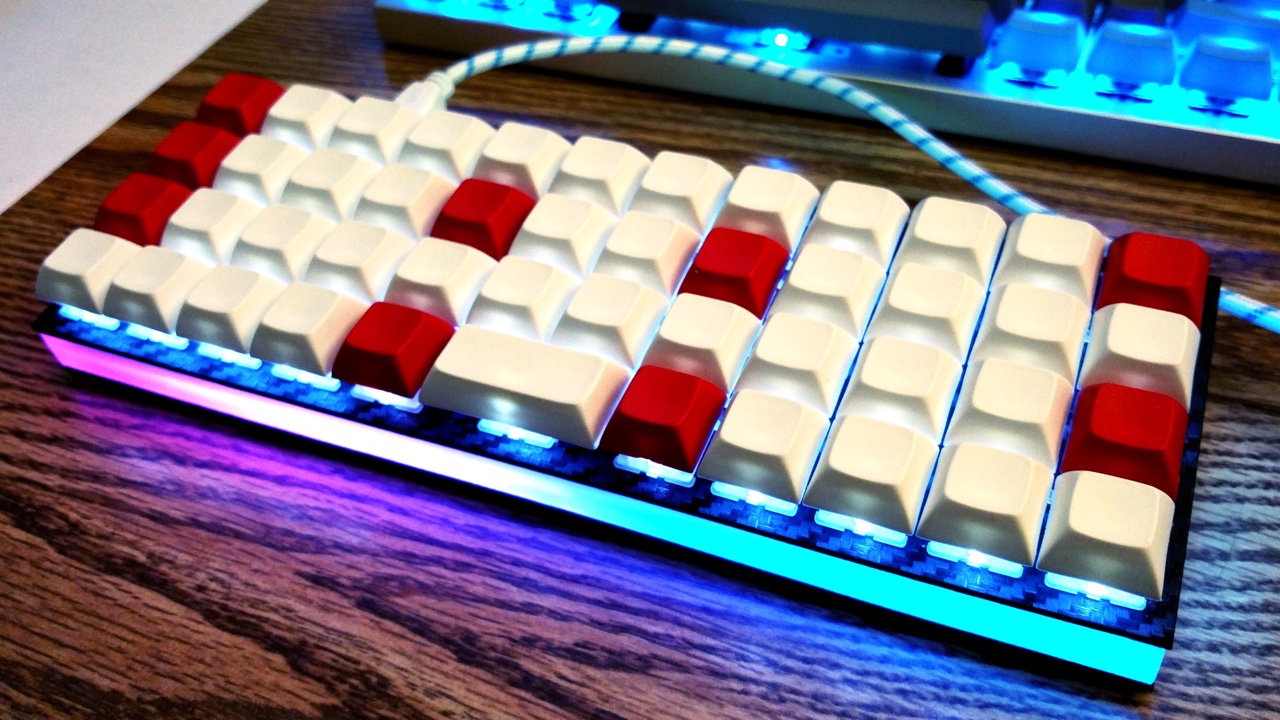
QMK has the ability to control RGB LEDs attached to your keyboard. This is commonly called *underglow*, due to the LEDs often being mounted on the bottom of the keyboard, producing a nice diffused effect when combined with a translucent case.
Some keyboards come with RGB LEDs preinstalled. Others must have them installed after the fact. See the [Hardware Modification](#hardware-modification) section for information on adding RGB lighting to your keyboard.
Currently QMK supports the following addressable LEDs on AVR microcontrollers (however, the white LED in RGBW variants is not supported):
* WS2811, WS2812, WS2812B, WS2812C, etc.
* SK6812, SK6812MINI, SK6805
These LEDs are called "addressable" because instead of using a wire per color, each LED contains a small microchip that understands a special protocol sent over a single wire. The chip passes on the remaining data to the next LED, allowing them to be chained together. In this way, you can easily control the color of the individual LEDs.
## Usage
On keyboards with onboard RGB LEDs, it is usually enabled by default. If it is not working for you, check that your `rules.mk` includes the following:
```make
RGBLIGHT_ENABLE = yes
```
At minimum you must define the data pin your LED strip is connected to, and the number of LEDs in the strip, in your `config.h`. If your keyboard has onboard RGB LEDs, and you are simply creating a keymap, you usually won't need to modify these.
|Define |Description |
|---------------|---------------------------------------------------------------------------------------------------------|
|`RGB_DI_PIN` |The pin connected to the data pin of the LEDs |
|`RGBLED_NUM` |The number of LEDs connected |
|`RGBLED_SPLIT` |(Optional) For split keyboards, the number of LEDs connected on each half directly wired to `RGB_DI_PIN` |
Then you should be able to use the keycodes below to change the RGB lighting to your liking.
### Color Selection
QMK uses [Hue, Saturation, and Value](https://en.wikipedia.org/wiki/HSL_and_HSV) to select colors rather than RGB. The color wheel below demonstrates how this works.
 Changing the **Hue** cycles around the circle.
Changing the **Saturation** moves between the inner and outer sections of the wheel, affecting the intensity of the color.
Changing the **Value** sets the overall brightness.
## Keycodes
|Key |Aliases |Description |
|-------------------|----------|--------------------------------------------------------------------|
|`RGB_TOG` | |Toggle RGB lighting on or off |
|`RGB_MODE_FORWARD` |`RGB_MOD` |Cycle through modes, reverse direction when Shift is held |
|`RGB_MODE_REVERSE` |`RGB_RMOD`|Cycle through modes in reverse, forward direction when Shift is held|
|`RGB_HUI` | |Increase hue |
|`RGB_HUD` | |Decrease hue |
|`RGB_SAI` | |Increase saturation |
|`RGB_SAD` | |Decrease saturation |
|`RGB_VAI` | |Increase value (brightness) |
|`RGB_VAD` | |Decrease value (brightness) |
|`RGB_MODE_PLAIN` |`RGB_M_P `|Static (no animation) mode |
|`RGB_MODE_BREATHE` |`RGB_M_B` |Breathing animation mode |
|`RGB_MODE_RAINBOW` |`RGB_M_R` |Rainbow animation mode |
|`RGB_MODE_SWIRL` |`RGB_M_SW`|Swirl animation mode |
|`RGB_MODE_SNAKE` |`RGB_M_SN`|Snake animation mode |
|`RGB_MODE_KNIGHT` |`RGB_M_K` |"Knight Rider" animation mode |
|`RGB_MODE_XMAS` |`RGB_M_X` |Christmas animation mode |
|`RGB_MODE_GRADIENT`|`RGB_M_G` |Static gradient animation mode |
|`RGB_MODE_RGBTEST` |`RGB_M_T` |Red, Green, Blue test animation mode |
## Configuration
Your RGB lighting can be configured by placing these `#define`s in your `config.h`:
|Define |Default |Description |
|---------------------|-------------|-----------------------------------------------------------------------------|
|`RGBLIGHT_HUE_STEP` |`10` |The number of steps to cycle through the hue by |
|`RGBLIGHT_SAT_STEP` |`17` |The number of steps to increment the saturation by |
|`RGBLIGHT_VAL_STEP` |`17` |The number of steps to increment the brightness by |
|`RGBLIGHT_LIMIT_VAL` |`255` |The maximum brightness level |
|`RGBLIGHT_SLEEP` |*Not defined*|If defined, the RGB lighting will be switched off when the host goes to sleep|
|`RGBLIGHT_SPLIT` |*Not defined*|If defined, synchronization functionality for split keyboards is added|
## Animations
Not only can this lighting be whatever color you want,
if `RGBLIGHT_EFFECT_xxxx` or `RGBLIGHT_ANIMATIONS` is defined, you also have a number of animation modes at your disposal:
|Mode number symbol |Additional number |Description |
|-----------------------------|-------------------|---------------------------------------|
|`RGBLIGHT_MODE_STATIC_LIGHT` | *None* |Solid color (this mode is always enabled) |
|`RGBLIGHT_MODE_BREATHING` | 0,1,2,3 |Solid color breathing |
|`RGBLIGHT_MODE_RAINBOW_MOOD` | 0,1,2 |Cycling rainbow |
|`RGBLIGHT_MODE_RAINBOW_SWIRL`| 0,1,2,3,4,5 |Swirling rainbow |
|`RGBLIGHT_MODE_SNAKE` | 0,1,2,3,4,5 |Snake |
|`RGBLIGHT_MODE_KNIGHT` | 0,1,2 |Knight |
|`RGBLIGHT_MODE_CHRISTMAS` | *None* |Christmas |
|`RGBLIGHT_MODE_STATIC_GRADIENT`| 0,1,..,9 |Static gradient |
|`RGBLIGHT_MODE_RGB_TEST` | *None* |RGB Test |
|`RGBLIGHT_MODE_ALTERNATING` | *None* |Alternating |
Check out [this video](https://youtube.com/watch?v=VKrpPAHlisY) for a demonstration.
Note: For versions older than 0.6.117, The mode numbers were written directly. In `quantum/rgblight.h` there is a contrast table between the old mode number and the current symbol.
The following options can be used to tweak the various animations:
|Define |Default |Description |
|------------------------------------|-------------|-------------------------------------------------------------------------------------|
|`RGBLIGHT_EFFECT_BREATHING` |*Not defined*|If defined, enable breathing animation mode. |
|`RGBLIGHT_EFFECT_RAINBOW_MOOD` |*Not defined*|If defined, enable rainbow mood animation mode. |
|`RGBLIGHT_EFFECT_RAINBOW_SWIRL` |*Not defined*|If defined, enable rainbow swirl animation mode. |
|`RGBLIGHT_EFFECT_SNAKE` |*Not defined*|If defined, enable snake animation mode. |
|`RGBLIGHT_EFFECT_KNIGHT` |*Not defined*|If defined, enable knight animation mode. |
|`RGBLIGHT_EFFECT_CHRISTMAS` |*Not defined*|If defined, enable christmas animation mode. |
|`RGBLIGHT_EFFECT_STATIC_GRADIENT` |*Not defined*|If defined, enable static gradient mode. |
|`RGBLIGHT_EFFECT_RGB_TEST` |*Not defined*|If defined, enable RGB test animation mode. |
|`RGBLIGHT_EFFECT_ALTERNATING` |*Not defined*|If defined, enable alternating animation mode. |
|`RGBLIGHT_ANIMATIONS` |*Not defined*|If defined, enables all additional animation modes |
|`RGBLIGHT_EFFECT_BREATHE_CENTER` |*Not defined*|If defined, used to calculate the curve for the breathing animation. Valid values are 1.0 to 2.7 |
|`RGBLIGHT_EFFECT_BREATHE_MAX` |`255` |The maximum brightness for the breathing mode. Valid values are 1 to 255 |
|`RGBLIGHT_EFFECT_SNAKE_LENGTH` |`4` |The number of LEDs to light up for the "Snake" animation |
|`RGBLIGHT_EFFECT_KNIGHT_LENGTH` |`3` |The number of LEDs to light up for the "Knight" animation |
|`RGBLIGHT_EFFECT_KNIGHT_OFFSET` |`0` |The number of LEDs to start the "Knight" animation from the start of the strip by |
|`RGBLIGHT_EFFECT_KNIGHT_LED_NUM` |`RGBLED_NUM` |The number of LEDs to have the "Knight" animation travel |
|`RGBLIGHT_EFFECT_CHRISTMAS_INTERVAL`|`1000` |How long to wait between light changes for the "Christmas" animation, in milliseconds|
|`RGBLIGHT_EFFECT_CHRISTMAS_STEP` |`2` |The number of LEDs to group the red/green colors by for the "Christmas" animation |
|`RGBLIGHT_RAINBOW_SWIRL_RANGE` |`360` |Range adjustment for the rainbow swirl effect to get different swirls |
You can also modify the speeds that the different modes animate at:
Here is a quick demo on Youtube (with NPKC KC60) (https://www.youtube.com/watch?v=VKrpPAHlisY).
```c
// How long (in milliseconds) to wait between animation steps for each of the "Solid color breathing" animations
const uint8_t RGBLED_BREATHING_INTERVALS[] PROGMEM = {30, 20, 10, 5};
// How long (in milliseconds) to wait between animation steps for each of the "Cycling rainbow" animations
const uint8_t RGBLED_RAINBOW_MOOD_INTERVALS[] PROGMEM = {120, 60, 30};
// How long (in milliseconds) to wait between animation steps for each of the "Swirling rainbow" animations
const uint8_t RGBLED_RAINBOW_SWIRL_INTERVALS[] PROGMEM = {100, 50, 20};
// How long (in milliseconds) to wait between animation steps for each of the "Snake" animations
const uint8_t RGBLED_SNAKE_INTERVALS[] PROGMEM = {100, 50, 20};
// How long (in milliseconds) to wait between animation steps for each of the "Knight" animations
const uint8_t RGBLED_KNIGHT_INTERVALS[] PROGMEM = {127, 63, 31};
// These control which hues are selected for each of the "Static gradient" modes
const uint8_t RGBLED_GRADIENT_RANGES[] PROGMEM = {255, 170, 127, 85, 64};
```
## Functions
If you need to change your RGB lighting in code, for example in a macro to change the color whenever you switch layers, QMK provides a set of functions to assist you. See [`rgblight.h`](https://github.com/qmk/qmk_firmware/blob/master/quantum/rgblight.h) for the full list, but the most commonly used functions include:
|Function |Description |
|--------------------------------------------|--------------------------------------------------------------------------------------------------------------------------------------------------------------|
|`rgblight_enable()` |Turn LEDs on, based on their previous state |
|`rgblight_enable_noeeprom()` |Turn LEDs on, based on their previous state (not written to EEPROM) |
|`rgblight_disable()` |Turn LEDs off |
|`rgblight_disable_noeeprom()` |Turn LEDs off (not written to EEPROM) |
|`rgblight_mode(x)` |Set the mode, if RGB animations are enabled |
|`rgblight_mode_noeeprom(x)` |Set the mode, if RGB animations are enabled (not written to EEPROM) |
|`rgblight_setrgb(r, g, b)` |Set all LEDs to the given RGB value where `r`/`g`/`b` are between 0 and 255 (not written to EEPROM) |
|`rgblight_setrgb_at(r, g, b, led)` |Set a single LED to the given RGB value, where `r`/`g`/`b` are between 0 and 255 and `led` is between 0 and `RGBLED_NUM` (not written to EEPROM) |
|`rgblight_setrgb_range(r, g, b, start, end)`|Set a continuous range of LEDs to the given RGB value, where `r`/`g`/`b` are between 0 and 255 and `start`(included) and `stop`(excluded) are between 0 and `RGBLED_NUM` (not written to EEPROM)|
|`rgblight_setrgb_master(r, g, b)` |Set the LEDs on the master side to the given RGB value, where `r`/`g`/`b` are between 0 and 255 (not written to EEPROM) |
|`rgblight_setrgb_slave(r, g, b)` |Set the LEDs on the slave side to the given RGB value, where `r`/`g`/`b` are between 0 and 255 (not written to EEPROM) |
|`rgblight_sethsv(h, s, v)` |Set all LEDs to the given HSV value where `h` is between 0 and 360 and `s`/`v` are between 0 and 255 |
|`rgblight_sethsv_noeeprom(h, s, v)` |Set all LEDs to the given HSV value where `h` is between 0 and 360 and `s`/`v` are between 0 and 255 (not written to EEPROM) |
|`rgblight_sethsv_at(h, s, v, led)` |Set a single LED to the given HSV value, where `h` is between 0 and 360, `s`/`v` are between 0 and 255, and `led` is between 0 and `RGBLED_NUM` (not written to EEPROM)|
|`rgblight_sethsv_range(h, s, v, start, end)`|Set a continuous range of LEDs to the given HSV value, where `h` is between 0 and 360, `s`/`v` are between 0 and 255, and `start`(included) and `stop`(excluded) are between 0 and `RGBLED_NUM` (not written to EEPROM)|
|`rgblight_sethsv_master(h, s, v)` |Set the LEDs on the master side to the given HSV value, where `h` is between 0 and 360, `s`/`v` are between 0 and 255 (not written to EEPROM) |
|`rgblight_sethsv_slave(h, s, v)` |Set the LEDs on the slave side to the given HSV value, where `h` is between 0 and 360, `s`/`v` are between 0 and 255 (not written to EEPROM) |
|`rgblight_toggle()` |Toggle all LEDs between on and off |
|`rgblight_toggle_noeeprom()` |Toggle all LEDs between on and off (not written to EEPROM) |
|`rgblight_step()` |Change the mode to the next RGB animation in the list of enabled RGB animations |
|`rgblight_step_noeeprom()` |Change the mode to the next RGB animation in the list of enabled RGB animations (not written to EEPROM) |
|`rgblight_step_reverse()` |Change the mode to the previous RGB animation in the list of enabled RGB animations |
|`rgblight_step_reverse_noeeprom()` |Change the mode to the previous RGB animation in the list of enabled RGB animations (not written to EEPROM) |
|`rgblight_increase_hue()` |Increase the hue for all LEDs. This wraps around at maximum hue |
|`rgblight_increase_hue_noeeprom()` |Increase the hue for all LEDs. This wraps around at maximum hue (not written to EEPROM) |
|`rgblight_decrease_hue()` |Decrease the hue for all LEDs. This wraps around at minimum hue |
|`rgblight_decrease_hue_noeeprom()` |Decrease the hue for all LEDs. This wraps around at minimum hue (not written to EEPROM) |
|`rgblight_increase_sat()` |Increase the saturation for all LEDs. This wraps around at maximum saturation |
|`rgblight_increase_sat_noeeprom()` |Increase the saturation for all LEDs. This wraps around at maximum saturation (not written to EEPROM) |
|`rgblight_decrease_sat()` |Decrease the saturation for all LEDs. This wraps around at minimum saturation |
|`rgblight_decrease_sat_noeeprom()` |Decrease the saturation for all LEDs. This wraps around at minimum saturation (not written to EEPROM) |
|`rgblight_increase_val()` |Increase the value for all LEDs. This wraps around at maximum value |
|`rgblight_increase_val_noeeprom()` |Increase the value for all LEDs. This wraps around at maximum value (not written to EEPROM) |
|`rgblight_decrease_val()` |Decrease the value for all LEDs. This wraps around at minimum value |
|`rgblight_decrease_val_noeeprom()` |Decrease the value for all LEDs. This wraps around at minimum value (not written to EEPROM) |
|`rgblight_set_clipping_range(pos, num)` |Set clipping Range |
## Colors
These are shorthands to popular colors. The `RGB` ones can be passed to the `setrgb` functions, while the `HSV` ones to the `sethsv` functions.
|RGB |HSV |
|-------------------|-------------------|
|`RGB_WHITE` |`HSV_WHITE` |
|`RGB_RED` |`HSV_RED` |
|`RGB_CORAL` |`HSV_CORAL` |
|`RGB_ORANGE` |`HSV_ORANGE` |
|`RGB_GOLDENROD` |`HSV_GOLDENROD` |
|`RGB_GOLD` |`HSV_GOLD` |
|`RGB_YELLOW` |`HSV_YELLOW` |
|`RGB_CHARTREUSE` |`HSV_CHARTREUSE` |
|`RGB_GREEN` |`HSV_GREEN` |
|`RGB_SPRINGGREEN` |`HSV_SPRINGGREEN` |
|`RGB_TURQUOISE` |`HSV_TURQUOISE` |
|`RGB_TEAL` |`HSV_TEAL` |
|`RGB_CYAN` |`HSV_CYAN` |
|`RGB_AZURE` |`HSV_AZURE` |
|`RGB_BLUE` |`HSV_BLUE` |
|`RGB_PURPLE` |`HSV_PURPLE` |
|`RGB_MAGENTA` |`HSV_MAGENTA` |
|`RGB_PINK` |`HSV_PINK` |
```c
rgblight_setrgb(RGB_ORANGE);
rgblight_sethsv_noeeprom(HSV_GREEN);
rgblight_setrgb_at(RGB_GOLD, 3);
rgblight_sethsv_range(HSV_WHITE, 0, 6);
```
These are defined in [`rgblight_list.h`](https://github.com/qmk/qmk_firmware/blob/master/quantum/rgblight_list.h). Feel free to add to this list!
## Changing the order of the LEDs
If you want to make the logical order of LEDs different from the electrical connection order, you can do this by defining the `RGBLIGHT_LED_MAP` macro in your `config.h`.
Normally, the contents of the LED buffer are output to the LEDs in the same order.
Changing the **Hue** cycles around the circle.
Changing the **Saturation** moves between the inner and outer sections of the wheel, affecting the intensity of the color.
Changing the **Value** sets the overall brightness.
## Keycodes
|Key |Aliases |Description |
|-------------------|----------|--------------------------------------------------------------------|
|`RGB_TOG` | |Toggle RGB lighting on or off |
|`RGB_MODE_FORWARD` |`RGB_MOD` |Cycle through modes, reverse direction when Shift is held |
|`RGB_MODE_REVERSE` |`RGB_RMOD`|Cycle through modes in reverse, forward direction when Shift is held|
|`RGB_HUI` | |Increase hue |
|`RGB_HUD` | |Decrease hue |
|`RGB_SAI` | |Increase saturation |
|`RGB_SAD` | |Decrease saturation |
|`RGB_VAI` | |Increase value (brightness) |
|`RGB_VAD` | |Decrease value (brightness) |
|`RGB_MODE_PLAIN` |`RGB_M_P `|Static (no animation) mode |
|`RGB_MODE_BREATHE` |`RGB_M_B` |Breathing animation mode |
|`RGB_MODE_RAINBOW` |`RGB_M_R` |Rainbow animation mode |
|`RGB_MODE_SWIRL` |`RGB_M_SW`|Swirl animation mode |
|`RGB_MODE_SNAKE` |`RGB_M_SN`|Snake animation mode |
|`RGB_MODE_KNIGHT` |`RGB_M_K` |"Knight Rider" animation mode |
|`RGB_MODE_XMAS` |`RGB_M_X` |Christmas animation mode |
|`RGB_MODE_GRADIENT`|`RGB_M_G` |Static gradient animation mode |
|`RGB_MODE_RGBTEST` |`RGB_M_T` |Red, Green, Blue test animation mode |
## Configuration
Your RGB lighting can be configured by placing these `#define`s in your `config.h`:
|Define |Default |Description |
|---------------------|-------------|-----------------------------------------------------------------------------|
|`RGBLIGHT_HUE_STEP` |`10` |The number of steps to cycle through the hue by |
|`RGBLIGHT_SAT_STEP` |`17` |The number of steps to increment the saturation by |
|`RGBLIGHT_VAL_STEP` |`17` |The number of steps to increment the brightness by |
|`RGBLIGHT_LIMIT_VAL` |`255` |The maximum brightness level |
|`RGBLIGHT_SLEEP` |*Not defined*|If defined, the RGB lighting will be switched off when the host goes to sleep|
|`RGBLIGHT_SPLIT` |*Not defined*|If defined, synchronization functionality for split keyboards is added|
## Animations
Not only can this lighting be whatever color you want,
if `RGBLIGHT_EFFECT_xxxx` or `RGBLIGHT_ANIMATIONS` is defined, you also have a number of animation modes at your disposal:
|Mode number symbol |Additional number |Description |
|-----------------------------|-------------------|---------------------------------------|
|`RGBLIGHT_MODE_STATIC_LIGHT` | *None* |Solid color (this mode is always enabled) |
|`RGBLIGHT_MODE_BREATHING` | 0,1,2,3 |Solid color breathing |
|`RGBLIGHT_MODE_RAINBOW_MOOD` | 0,1,2 |Cycling rainbow |
|`RGBLIGHT_MODE_RAINBOW_SWIRL`| 0,1,2,3,4,5 |Swirling rainbow |
|`RGBLIGHT_MODE_SNAKE` | 0,1,2,3,4,5 |Snake |
|`RGBLIGHT_MODE_KNIGHT` | 0,1,2 |Knight |
|`RGBLIGHT_MODE_CHRISTMAS` | *None* |Christmas |
|`RGBLIGHT_MODE_STATIC_GRADIENT`| 0,1,..,9 |Static gradient |
|`RGBLIGHT_MODE_RGB_TEST` | *None* |RGB Test |
|`RGBLIGHT_MODE_ALTERNATING` | *None* |Alternating |
Check out [this video](https://youtube.com/watch?v=VKrpPAHlisY) for a demonstration.
Note: For versions older than 0.6.117, The mode numbers were written directly. In `quantum/rgblight.h` there is a contrast table between the old mode number and the current symbol.
The following options can be used to tweak the various animations:
|Define |Default |Description |
|------------------------------------|-------------|-------------------------------------------------------------------------------------|
|`RGBLIGHT_EFFECT_BREATHING` |*Not defined*|If defined, enable breathing animation mode. |
|`RGBLIGHT_EFFECT_RAINBOW_MOOD` |*Not defined*|If defined, enable rainbow mood animation mode. |
|`RGBLIGHT_EFFECT_RAINBOW_SWIRL` |*Not defined*|If defined, enable rainbow swirl animation mode. |
|`RGBLIGHT_EFFECT_SNAKE` |*Not defined*|If defined, enable snake animation mode. |
|`RGBLIGHT_EFFECT_KNIGHT` |*Not defined*|If defined, enable knight animation mode. |
|`RGBLIGHT_EFFECT_CHRISTMAS` |*Not defined*|If defined, enable christmas animation mode. |
|`RGBLIGHT_EFFECT_STATIC_GRADIENT` |*Not defined*|If defined, enable static gradient mode. |
|`RGBLIGHT_EFFECT_RGB_TEST` |*Not defined*|If defined, enable RGB test animation mode. |
|`RGBLIGHT_EFFECT_ALTERNATING` |*Not defined*|If defined, enable alternating animation mode. |
|`RGBLIGHT_ANIMATIONS` |*Not defined*|If defined, enables all additional animation modes |
|`RGBLIGHT_EFFECT_BREATHE_CENTER` |*Not defined*|If defined, used to calculate the curve for the breathing animation. Valid values are 1.0 to 2.7 |
|`RGBLIGHT_EFFECT_BREATHE_MAX` |`255` |The maximum brightness for the breathing mode. Valid values are 1 to 255 |
|`RGBLIGHT_EFFECT_SNAKE_LENGTH` |`4` |The number of LEDs to light up for the "Snake" animation |
|`RGBLIGHT_EFFECT_KNIGHT_LENGTH` |`3` |The number of LEDs to light up for the "Knight" animation |
|`RGBLIGHT_EFFECT_KNIGHT_OFFSET` |`0` |The number of LEDs to start the "Knight" animation from the start of the strip by |
|`RGBLIGHT_EFFECT_KNIGHT_LED_NUM` |`RGBLED_NUM` |The number of LEDs to have the "Knight" animation travel |
|`RGBLIGHT_EFFECT_CHRISTMAS_INTERVAL`|`1000` |How long to wait between light changes for the "Christmas" animation, in milliseconds|
|`RGBLIGHT_EFFECT_CHRISTMAS_STEP` |`2` |The number of LEDs to group the red/green colors by for the "Christmas" animation |
|`RGBLIGHT_RAINBOW_SWIRL_RANGE` |`360` |Range adjustment for the rainbow swirl effect to get different swirls |
You can also modify the speeds that the different modes animate at:
Here is a quick demo on Youtube (with NPKC KC60) (https://www.youtube.com/watch?v=VKrpPAHlisY).
```c
// How long (in milliseconds) to wait between animation steps for each of the "Solid color breathing" animations
const uint8_t RGBLED_BREATHING_INTERVALS[] PROGMEM = {30, 20, 10, 5};
// How long (in milliseconds) to wait between animation steps for each of the "Cycling rainbow" animations
const uint8_t RGBLED_RAINBOW_MOOD_INTERVALS[] PROGMEM = {120, 60, 30};
// How long (in milliseconds) to wait between animation steps for each of the "Swirling rainbow" animations
const uint8_t RGBLED_RAINBOW_SWIRL_INTERVALS[] PROGMEM = {100, 50, 20};
// How long (in milliseconds) to wait between animation steps for each of the "Snake" animations
const uint8_t RGBLED_SNAKE_INTERVALS[] PROGMEM = {100, 50, 20};
// How long (in milliseconds) to wait between animation steps for each of the "Knight" animations
const uint8_t RGBLED_KNIGHT_INTERVALS[] PROGMEM = {127, 63, 31};
// These control which hues are selected for each of the "Static gradient" modes
const uint8_t RGBLED_GRADIENT_RANGES[] PROGMEM = {255, 170, 127, 85, 64};
```
## Functions
If you need to change your RGB lighting in code, for example in a macro to change the color whenever you switch layers, QMK provides a set of functions to assist you. See [`rgblight.h`](https://github.com/qmk/qmk_firmware/blob/master/quantum/rgblight.h) for the full list, but the most commonly used functions include:
|Function |Description |
|--------------------------------------------|--------------------------------------------------------------------------------------------------------------------------------------------------------------|
|`rgblight_enable()` |Turn LEDs on, based on their previous state |
|`rgblight_enable_noeeprom()` |Turn LEDs on, based on their previous state (not written to EEPROM) |
|`rgblight_disable()` |Turn LEDs off |
|`rgblight_disable_noeeprom()` |Turn LEDs off (not written to EEPROM) |
|`rgblight_mode(x)` |Set the mode, if RGB animations are enabled |
|`rgblight_mode_noeeprom(x)` |Set the mode, if RGB animations are enabled (not written to EEPROM) |
|`rgblight_setrgb(r, g, b)` |Set all LEDs to the given RGB value where `r`/`g`/`b` are between 0 and 255 (not written to EEPROM) |
|`rgblight_setrgb_at(r, g, b, led)` |Set a single LED to the given RGB value, where `r`/`g`/`b` are between 0 and 255 and `led` is between 0 and `RGBLED_NUM` (not written to EEPROM) |
|`rgblight_setrgb_range(r, g, b, start, end)`|Set a continuous range of LEDs to the given RGB value, where `r`/`g`/`b` are between 0 and 255 and `start`(included) and `stop`(excluded) are between 0 and `RGBLED_NUM` (not written to EEPROM)|
|`rgblight_setrgb_master(r, g, b)` |Set the LEDs on the master side to the given RGB value, where `r`/`g`/`b` are between 0 and 255 (not written to EEPROM) |
|`rgblight_setrgb_slave(r, g, b)` |Set the LEDs on the slave side to the given RGB value, where `r`/`g`/`b` are between 0 and 255 (not written to EEPROM) |
|`rgblight_sethsv(h, s, v)` |Set all LEDs to the given HSV value where `h` is between 0 and 360 and `s`/`v` are between 0 and 255 |
|`rgblight_sethsv_noeeprom(h, s, v)` |Set all LEDs to the given HSV value where `h` is between 0 and 360 and `s`/`v` are between 0 and 255 (not written to EEPROM) |
|`rgblight_sethsv_at(h, s, v, led)` |Set a single LED to the given HSV value, where `h` is between 0 and 360, `s`/`v` are between 0 and 255, and `led` is between 0 and `RGBLED_NUM` (not written to EEPROM)|
|`rgblight_sethsv_range(h, s, v, start, end)`|Set a continuous range of LEDs to the given HSV value, where `h` is between 0 and 360, `s`/`v` are between 0 and 255, and `start`(included) and `stop`(excluded) are between 0 and `RGBLED_NUM` (not written to EEPROM)|
|`rgblight_sethsv_master(h, s, v)` |Set the LEDs on the master side to the given HSV value, where `h` is between 0 and 360, `s`/`v` are between 0 and 255 (not written to EEPROM) |
|`rgblight_sethsv_slave(h, s, v)` |Set the LEDs on the slave side to the given HSV value, where `h` is between 0 and 360, `s`/`v` are between 0 and 255 (not written to EEPROM) |
|`rgblight_toggle()` |Toggle all LEDs between on and off |
|`rgblight_toggle_noeeprom()` |Toggle all LEDs between on and off (not written to EEPROM) |
|`rgblight_step()` |Change the mode to the next RGB animation in the list of enabled RGB animations |
|`rgblight_step_noeeprom()` |Change the mode to the next RGB animation in the list of enabled RGB animations (not written to EEPROM) |
|`rgblight_step_reverse()` |Change the mode to the previous RGB animation in the list of enabled RGB animations |
|`rgblight_step_reverse_noeeprom()` |Change the mode to the previous RGB animation in the list of enabled RGB animations (not written to EEPROM) |
|`rgblight_increase_hue()` |Increase the hue for all LEDs. This wraps around at maximum hue |
|`rgblight_increase_hue_noeeprom()` |Increase the hue for all LEDs. This wraps around at maximum hue (not written to EEPROM) |
|`rgblight_decrease_hue()` |Decrease the hue for all LEDs. This wraps around at minimum hue |
|`rgblight_decrease_hue_noeeprom()` |Decrease the hue for all LEDs. This wraps around at minimum hue (not written to EEPROM) |
|`rgblight_increase_sat()` |Increase the saturation for all LEDs. This wraps around at maximum saturation |
|`rgblight_increase_sat_noeeprom()` |Increase the saturation for all LEDs. This wraps around at maximum saturation (not written to EEPROM) |
|`rgblight_decrease_sat()` |Decrease the saturation for all LEDs. This wraps around at minimum saturation |
|`rgblight_decrease_sat_noeeprom()` |Decrease the saturation for all LEDs. This wraps around at minimum saturation (not written to EEPROM) |
|`rgblight_increase_val()` |Increase the value for all LEDs. This wraps around at maximum value |
|`rgblight_increase_val_noeeprom()` |Increase the value for all LEDs. This wraps around at maximum value (not written to EEPROM) |
|`rgblight_decrease_val()` |Decrease the value for all LEDs. This wraps around at minimum value |
|`rgblight_decrease_val_noeeprom()` |Decrease the value for all LEDs. This wraps around at minimum value (not written to EEPROM) |
|`rgblight_set_clipping_range(pos, num)` |Set clipping Range |
## Colors
These are shorthands to popular colors. The `RGB` ones can be passed to the `setrgb` functions, while the `HSV` ones to the `sethsv` functions.
|RGB |HSV |
|-------------------|-------------------|
|`RGB_WHITE` |`HSV_WHITE` |
|`RGB_RED` |`HSV_RED` |
|`RGB_CORAL` |`HSV_CORAL` |
|`RGB_ORANGE` |`HSV_ORANGE` |
|`RGB_GOLDENROD` |`HSV_GOLDENROD` |
|`RGB_GOLD` |`HSV_GOLD` |
|`RGB_YELLOW` |`HSV_YELLOW` |
|`RGB_CHARTREUSE` |`HSV_CHARTREUSE` |
|`RGB_GREEN` |`HSV_GREEN` |
|`RGB_SPRINGGREEN` |`HSV_SPRINGGREEN` |
|`RGB_TURQUOISE` |`HSV_TURQUOISE` |
|`RGB_TEAL` |`HSV_TEAL` |
|`RGB_CYAN` |`HSV_CYAN` |
|`RGB_AZURE` |`HSV_AZURE` |
|`RGB_BLUE` |`HSV_BLUE` |
|`RGB_PURPLE` |`HSV_PURPLE` |
|`RGB_MAGENTA` |`HSV_MAGENTA` |
|`RGB_PINK` |`HSV_PINK` |
```c
rgblight_setrgb(RGB_ORANGE);
rgblight_sethsv_noeeprom(HSV_GREEN);
rgblight_setrgb_at(RGB_GOLD, 3);
rgblight_sethsv_range(HSV_WHITE, 0, 6);
```
These are defined in [`rgblight_list.h`](https://github.com/qmk/qmk_firmware/blob/master/quantum/rgblight_list.h). Feel free to add to this list!
## Changing the order of the LEDs
If you want to make the logical order of LEDs different from the electrical connection order, you can do this by defining the `RGBLIGHT_LED_MAP` macro in your `config.h`.
Normally, the contents of the LED buffer are output to the LEDs in the same order.
 By defining `RGBLIGHT_LED_MAP` as in the example below, you can specify the LED with addressing in reverse order of the electrical connection order.
```c
// config.h
#define RGBLED_NUM 4
#define RGBLIGHT_LED_MAP { 3, 2, 1, 0 }
```
By defining `RGBLIGHT_LED_MAP` as in the example below, you can specify the LED with addressing in reverse order of the electrical connection order.
```c
// config.h
#define RGBLED_NUM 4
#define RGBLIGHT_LED_MAP { 3, 2, 1, 0 }
```
 For keyboards that use the RGB LEDs as a backlight for each key, you can also define it as in the example below.
```c
// config.h
#define RGBLED_NUM 30
/* RGB LED Conversion macro from physical array to electric array */
#define LED_LAYOUT( \
L00, L01, L02, L03, L04, L05, \
L10, L11, L12, L13, L14, L15, \
L20, L21, L22, L23, L24, L25, \
L30, L31, L32, L33, L34, L35, \
L40, L41, L42, L43, L44, L45 ) \
{ \
L05, L04, L03, L02, L01, L00, \
L10, L11, L12, L13, L14, L15, \
L25, L24, L23, L22, L21, L20, \
L30, L31, L32, L33, L34, L35, \
L46, L45, L44, L43, L42, L41 \
}
/* RGB LED logical order map */
/* Top->Bottom, Right->Left */
#define RGBLIGHT_LED_MAP LED_LAYOUT( \
25, 20, 15, 10, 5, 0, \
26, 21, 16, 11, 6, 1, \
27, 22, 17, 12, 7, 2, \
28, 23, 18, 13, 8, 3, \
29, 24, 19, 14, 9, 4 )
```
## Clipping Range
Using the `rgblight_set_clipping_range()` function, you can prepare more buffers than the actual number of LEDs, and output some of the buffers to the LEDs. This is useful if you want the split keyboard to treat left and right LEDs as logically contiguous.
You can set the Clipping Range by executing the following code.
```c
// some soruce
rgblight_set_clipping_range(3, 4);
```
For keyboards that use the RGB LEDs as a backlight for each key, you can also define it as in the example below.
```c
// config.h
#define RGBLED_NUM 30
/* RGB LED Conversion macro from physical array to electric array */
#define LED_LAYOUT( \
L00, L01, L02, L03, L04, L05, \
L10, L11, L12, L13, L14, L15, \
L20, L21, L22, L23, L24, L25, \
L30, L31, L32, L33, L34, L35, \
L40, L41, L42, L43, L44, L45 ) \
{ \
L05, L04, L03, L02, L01, L00, \
L10, L11, L12, L13, L14, L15, \
L25, L24, L23, L22, L21, L20, \
L30, L31, L32, L33, L34, L35, \
L46, L45, L44, L43, L42, L41 \
}
/* RGB LED logical order map */
/* Top->Bottom, Right->Left */
#define RGBLIGHT_LED_MAP LED_LAYOUT( \
25, 20, 15, 10, 5, 0, \
26, 21, 16, 11, 6, 1, \
27, 22, 17, 12, 7, 2, \
28, 23, 18, 13, 8, 3, \
29, 24, 19, 14, 9, 4 )
```
## Clipping Range
Using the `rgblight_set_clipping_range()` function, you can prepare more buffers than the actual number of LEDs, and output some of the buffers to the LEDs. This is useful if you want the split keyboard to treat left and right LEDs as logically contiguous.
You can set the Clipping Range by executing the following code.
```c
// some soruce
rgblight_set_clipping_range(3, 4);
```
 In addition to setting the Clipping Range, you can use `RGBLIGHT_LED_MAP` together.
```c
// config.h
#define RGBLED_NUM 8
#define RGBLIGHT_LED_MAP { 7, 6, 5, 4, 3, 2, 1, 0 }
// some soruce
rgblight_set_clipping_range(3, 4);
```
In addition to setting the Clipping Range, you can use `RGBLIGHT_LED_MAP` together.
```c
// config.h
#define RGBLED_NUM 8
#define RGBLIGHT_LED_MAP { 7, 6, 5, 4, 3, 2, 1, 0 }
// some soruce
rgblight_set_clipping_range(3, 4);
```
 If your keyboard lacks onboard underglow LEDs, you may often be able to solder on an RGB LED strip yourself. You will need to find an unused pin to wire to the data pin of your LED strip. Some keyboards may break out unused pins from the MCU to make soldering easier. The other two pins, VCC and GND, must also be connected to the appropriate power pins.